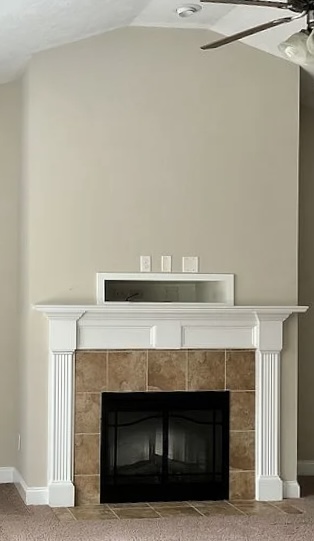
For the 5 years we’ve owned our home, I was only drawn to ‘light and airy’ interiors. So everything had to be white. When we first bought the house, the tiles around the fireplace were orange-y.
I’ve wanted to remove them for years, but the thought of it was daunting. Not to mention I didn’t really have the tools and knowledge to be able to pull it off. In the DIY world totem pole, if there was such a thing, I’m at the bottom. I am a total beginner.
So the first time I updated it back in 2021, I did the easiest and most inexpensive upgrade: I painted it white.
This worked for a while. I think whites will always be timeless and calming, something I always wanted to be reflected in our home.
But in 2024, I started longing for more boldness and warmth. I began saving pins on Pinterest, and became drawn to Mediterranean style interiors.
I just fell in love! I wanted our home to start feeling like a vacation house, rather than just one of the boring houses in north Georgia.
I noticed that Mediterranean style has lots of organic textured walls and arches. Lots of arches!
So beautiful, but I felt a bit discouraged.
I realized that I didn’t have the bandwidth let alone the budget to start DIYing our entryways into arches, nor adding arched cabinetry, so I thought of the quickest way to bring in texture and warmth into our home now.
time for a change
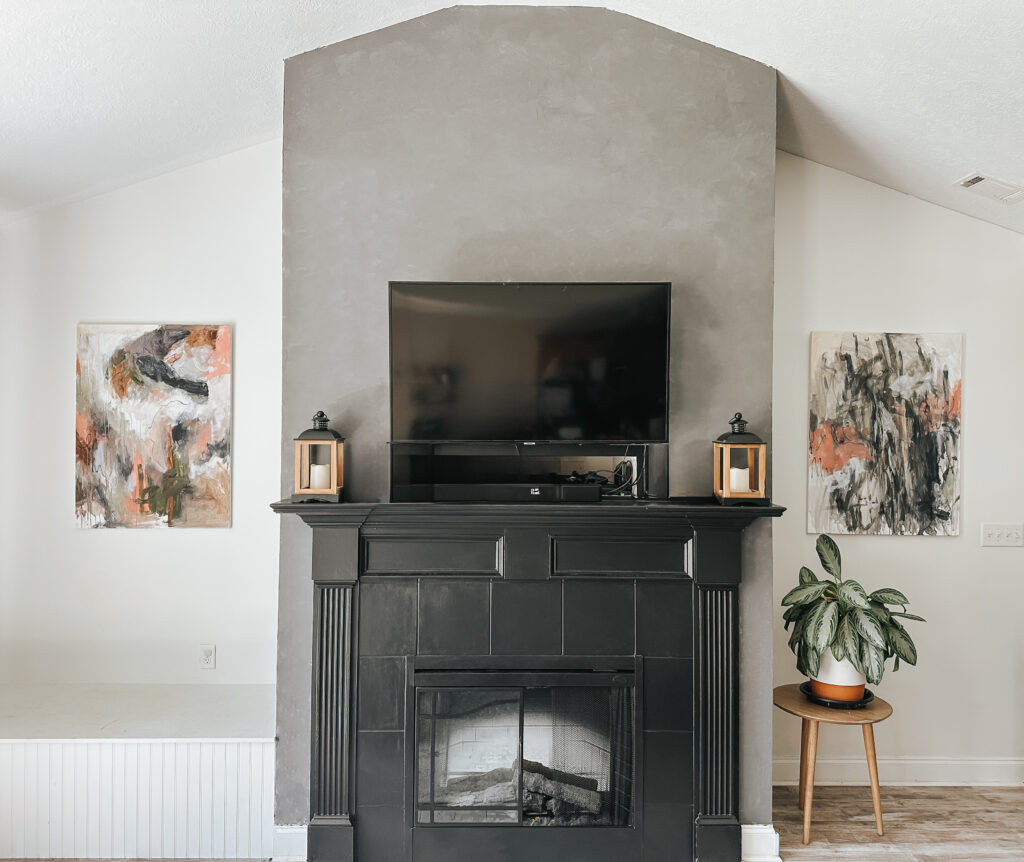
I’ve had my eye on this fireplace wall for a while.
After years of it just being nondescript, I felt like it should be making a statement.
I started looking for different fireplace wall designs. Initially, whitewashed stones really stood out to me, but aside from it being a daunting work, it still didn’t give me that Mediterranean vibe I was looking for.
Then I learned about Roman clay. Even better, I learned about “faux” Roman clay- haha!
This was such an easy and inexpensive project; it only took me two days to complete. You can probably even do it in one day!
Let’s get started.
Materials I used
For this project, I only bought 4 items:
- All-purpose joint compound (I used this 3.5 qt one from Home Depot, but I didn’t even finish the whole thing!)
- Black paint in flat finish (I used 1 quart of “Tricorn Black” from Sherwin Williams)
- Paint mixer drill attachment (this is the one I bought)
- Putty knives (I bought this set but only used one size for the whole project)
- Multi-purpose sponge and sandpaper (I already had these on hand)
That’s it!
[PS: I’m not an affiliate for any of these products, these are just the exact ones I bought from Home Depot and SW]
Now let’s get into the steps.
1. Prep surface
Wipe down or dust your surface.
This could be a messy job, so you can tape around the walls, floors, or ceiling that you don’t want paint to get on.
I was lazy and just wanted to get it done, so I didn’t tape. It’s up to you! I was careful, and there were a few spots I had to wipe down after but it was no big deal.
2. Mix paint and joint compound
This part was very time-consuming, but satisfying! I poured the black paint directly into the joint compound container a little bit at a time, and mixed them together using the paint mixer drill attachment.
If you pour it all at once, it could overflow, especially if you don’t reduce the amount of joint compound (I didn’t). Do it slowly! Or you’ll get paint splatter like I did, oops.
It came out dark grayish, which was what I was going for, for a more “concrete-y” look. You can modify the paint-to-joint compound ratio until you reach your desired shade. If you want it darker, add more paint. If it’s too dark, add more joint compound.

3. Apply first layer on the wall
Dip the putty knife into the mixture and apply a thin layer onto the wall.
I found that starting from the edges with the putty knife and working my way in was the easiest. Spread the mixture in random patterns for a more organic look.

4. Build layers
The mixture applies dark, but lightens as it dries.
If you want a second layer, let it completely dry to the touch. Lightly sand rough edges and gently wipe down with damp sponge in between layers.

5. Seal
I skipped this step completely, but I do plan to go back and add another layer, and seal it. Sealing protects it from moisture and wear and makes it easier to clean. Use a clear sealant after the final layer is dry.
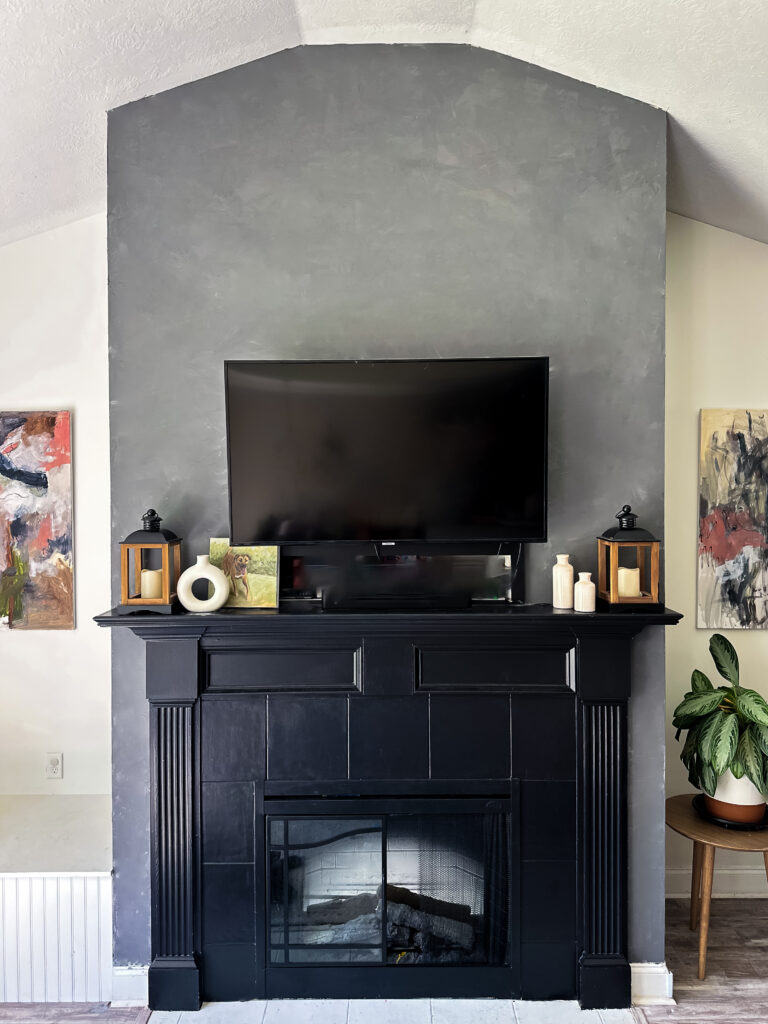
In this post I shared with you how I transformed our fireplace wall from bland to bold, using a faux Roman clay technique with only a few materials.
I hope this was helpful, let me know if this is something you’d want to try. If you are a more experienced DIYer, feel free to give me pointers on what I could do better!
